grab our FREE
‘Do’s & Don’ts of what to add to your website’ Guide.
‘Do’s & Don’ts of what to add to your website’ Guide.
emails with additional helpful content.
Hi, we're so glad you found us.
We love helping creatives like you finally have the website you’ve always wanted.
few simple steps
Follow us
How to Update Master Colours in Showit
Last week, we covered updating your Master Fonts and, this week we continue branding your website template (to make it reflect you and your business) with our Seven Steps on How to Update Master Colours in Showit, using Site Styles.
Wait, want to learn more? Check out our entire – How-to Use Showit Series below.
- 1. How to Create a Showit Subscription
- 2. How to Import Your Showit Template
- 3. How to Update Text in Showit
- 4. How to Import & Update your images in Showit
- 5. How to Update Images in Galleries & Canvas Views inside Showit
- 6a. How to Update Master Fonts in Showit – Site Styles Part 1
- 6b. How to Update Master Colours in Showit – (this is the blog you’re reading)
- 7. How to Update Site Canvases in Showit
- 8a. How to add my Instagram Feed to a Showit Website – Links Part 1
- 8b. How to Link to Email Addresses in Showit – Links Part 2
- 9. How to Link to your Social Media Accounts in Showit – Links Part 3
- 10. How Blogging works with Showit
- 11. How to get your Showit Website Ready for Launch
- 12. Countdown to Launching your Showit Website
- BONUS – After your 14-day free Showit trial – use our affiliate link to get your first paid month for free!

Master Colours and Site Styles
To update your Master Colours we will be using Site Styles located in Design Settings.
Design Settings allow you to make global changes across your whole website. Think of them as your brand style guide. You pick the colours and fonts and use them across your website.
Follow our 7-Step Process
Step 1
How to Update Master Colours in Showit
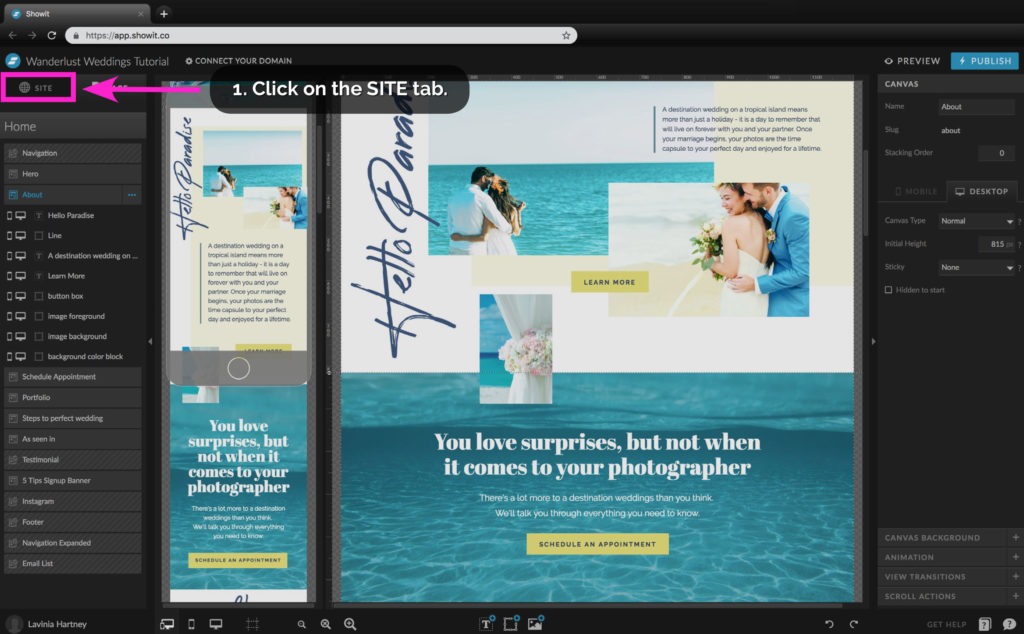
• Follow the pink arrow above to access the SITE tab.
You can find Design Settings under this tab.
1. Click on the SITE tab to make it active.
Step 2
How to Update Master Colours in Showit
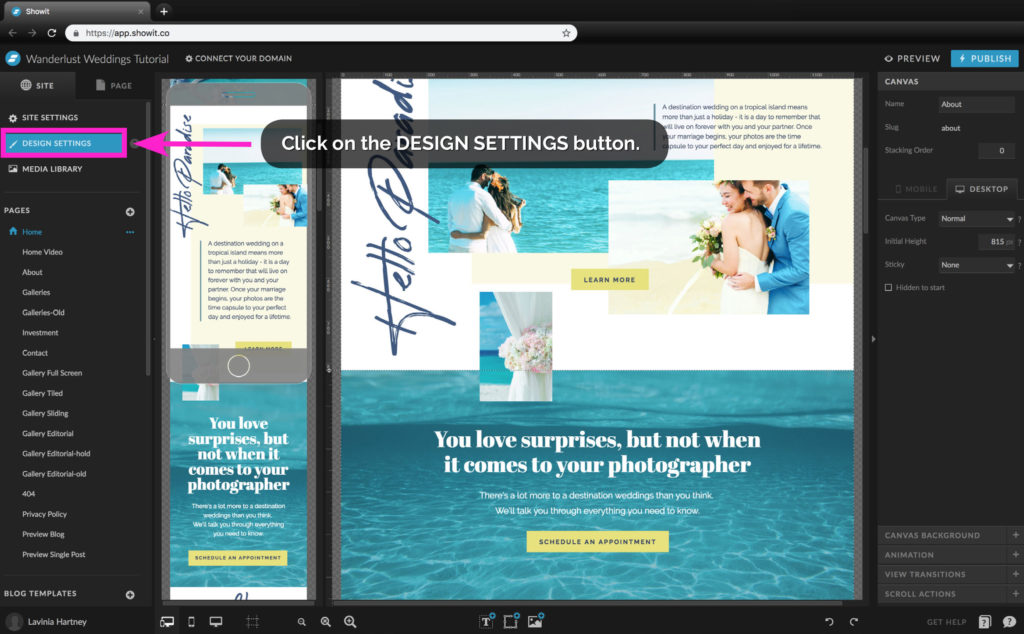
• Click on the DESIGN SETTINGS button to access the Design Settings page.
Step 3
How to Update Master Colours in Showit
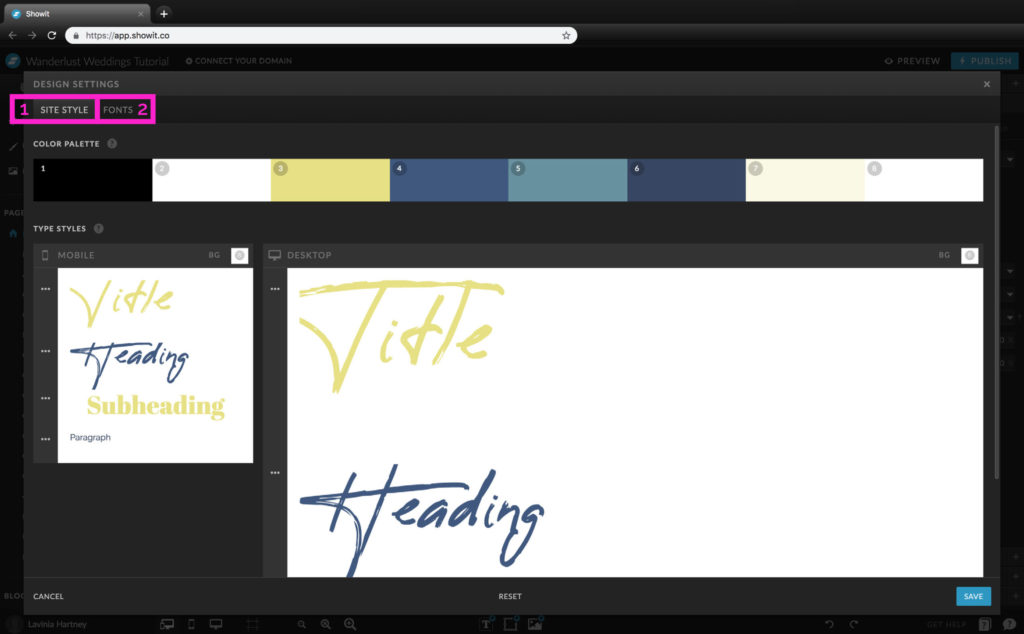
• The screen above Shows the DESIGN SETTINGS screen.
• There are two main tabs at the top of the screen.
The SITE STYLE (1) tab and FONTS (2) tab (we’ll look at the FONTS tab later).
• COLOUR PALETTE section
– This is below the main tabs
– They contain eight colour swatches you can use for your brand colours.
• TYPE STYLES section
– This allows you to adjust fonts across your site in one area.
– There are four ways fonts are listed.
Title. These are the page titles on your website.
Headings. The main headings on your website.
Sub Headings. This is known as the smaller headings on your website.
Paragraph = The main body copy on your website.
Step 4
How to Update Master Colours in Showit
Exercise 1 – Changing a colour.
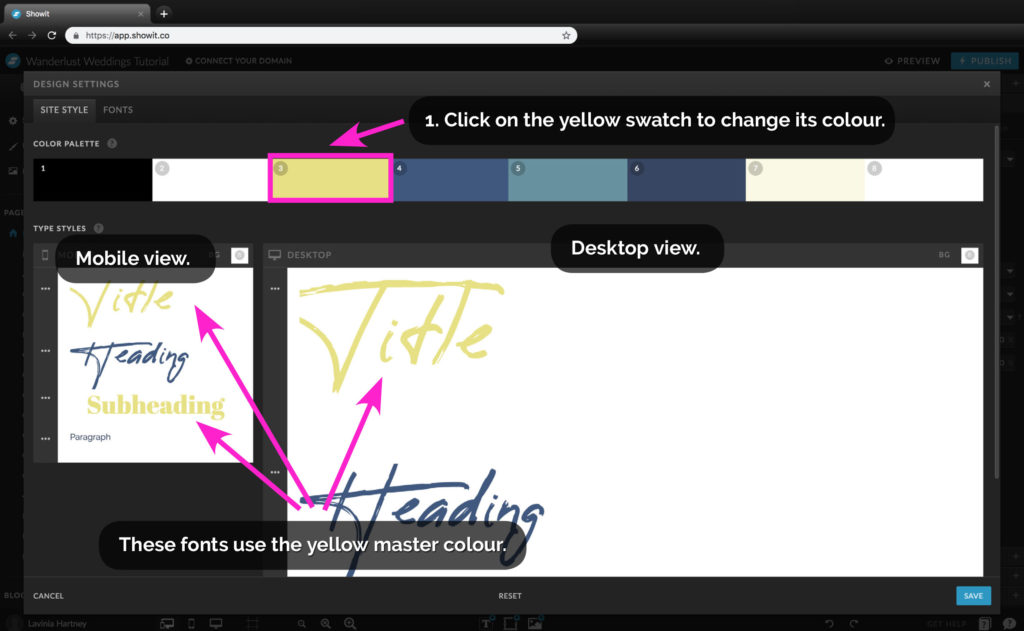
We’ll be updating the yellow swatch in this exercise. You can substitute yellow for any colour in your template.
• Look at the image above. Two font types use yellow. The Title and the Subheading (Note: the subheading is hidden on our desktop view, but would be visible if you scroll down).
• Let’s change the yellow to a new colour.
- Click the yellow swatch so we can select a new colour for that swatch.
Step 5
How to Update Master Colours in Showit
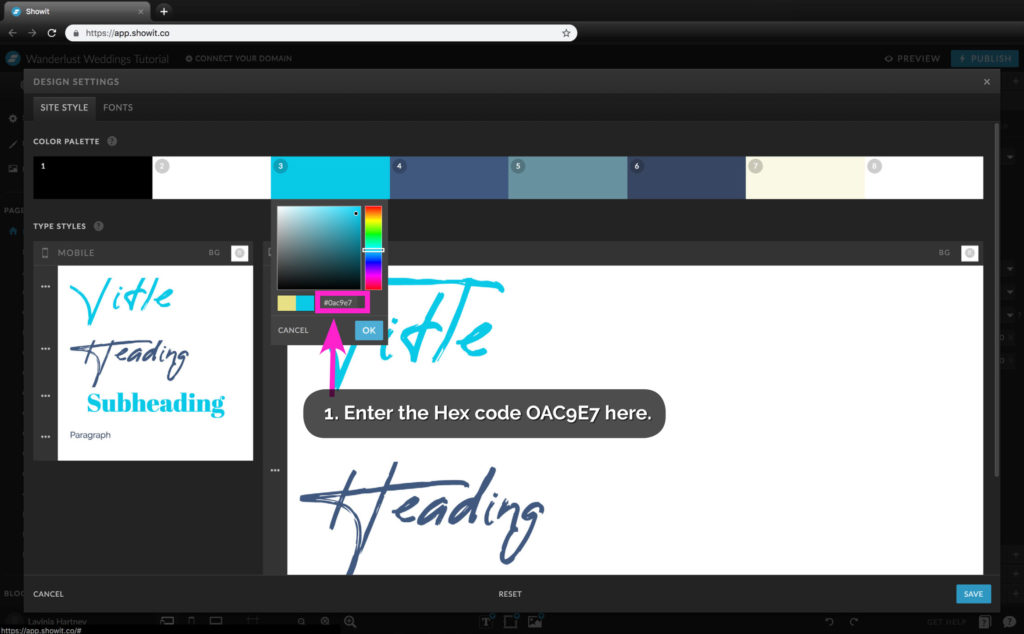
1. Click in the box as shown above and enter the hex code OAC9E7.
2. Click OK.
Insider Tip:
“What’s the Hex Code? It sounds very technical!”
A Hex Code is simply a way of representing a colour using a combination of six letters & numbers. Once you design your brand colours, you can convert these to Hex Codes and use them across all your digital media, so the colours are consistent.
Step 6
How to Update Master Colours in Showit
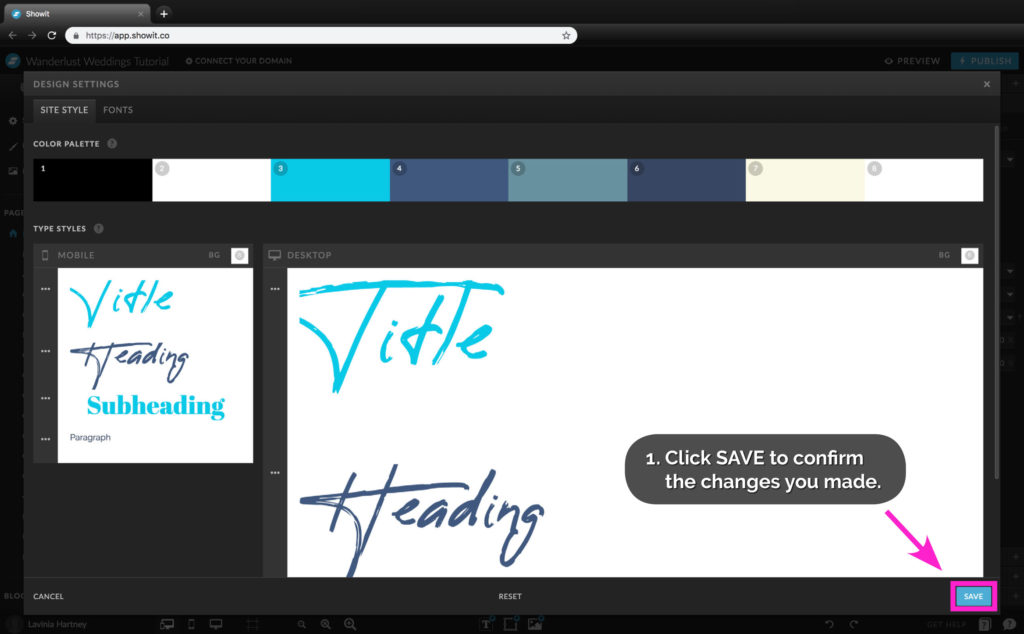
Congratulations! You have just adjusted a swatch colour.
On the above screens, we can see the results. The yellow-coloured text is now cyan. But it goes further than that!
- Click SAVE to confirm your changes and close the DESIGN SETTING screen.
Step 7
How to Update Master Colours in Showit
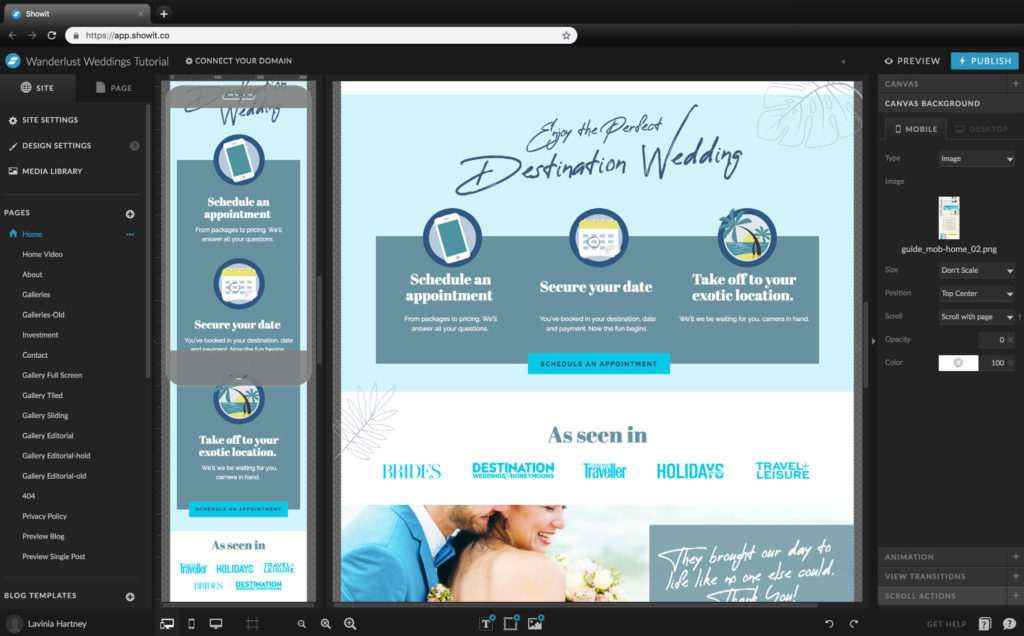
• Back on the Layout Screen, we can see that all elements in the design that were yellow are now cyan.
• This is the power of SITE STYLES one change, and everything that uses that master colour will update.
Insider Tip:
The key to using master colours is to experiment.
Try using your softer brand colours for background elements and stronger ones for items you want to stand out.
You Did it!
Now you know How to Update Master Colours in Showit and watch your template turn from generic to personalised, reflecting you and your brand.
Your Action Steps:
- Decide what colour/s you want to update, then head to the Site Tab
- Click on the Design Settings Button
- From the eight colour swatches pick which one you want to update
- Enter your brand’s hex code colour and save
- Congratulate yourself! You have Updated your Master Colours
After your 14-day free Showit trial – get an additional paid month for free!
Ready to start creating your website with Showit? Hit the button below and get your first subscription month for free.
Full disclosure, this is our affiliate link. So if you join Showit, you’ll be supporting us which helps us produce more content like this, at no additional cost to you.
Where to now?
The next step is to learn all about the power of Site Canvases. We’ll cover that in Part 7 – How to Update Showit Site Canvases. Take me there now!
Like this Blog Post?
PIN IT FOR LATER. And for more helpful tips follow us on PINTEREST.

Search
Create & launch your website in a
few simple steps
FREE GUIDE
While you’re here,
grab our FREE
‘Do’s & Don’ts of what to add to your website’ Guide.
‘Do’s & Don’ts of what to add to your website’ Guide.
When you sign up, we’ll send you
emails with additional helpful content.
About Lavinia & Tom
Hi, we're so glad you found us.
We love helping creatives like you finally have the website you’ve always wanted.
Blog Categories
Follow us
